
The Sweet & Savory Science Behind The Sauce
The magic of Honey Garlic Chicken lies in the interplay of its two primary components: honey and garlic. But simply throwing them together won’t guarantee success. The honey provides sweetness, viscosity, and a subtle floral note, while garlic brings pungent aroma, savory depth, and a hint of spice. The ideal balance requires understanding how these elements react under heat. Honey, being primarily sugar, caramelizes at high temperatures, developing richer, more complex flavors. However, excessive heat can lead to burning and bitterness. Garlic, on the other hand, contains allicin, the compound responsible for its characteristic aroma and flavor. Overcooking garlic destroys allicin, resulting in a bland, almost acrid taste. The key, then, is to cook the garlic gently and allow the honey to caramelize without burning, creating a harmonious blend of sweet, savory, and aromatic notes. The Maillard reaction, a chemical reaction between amino acids and reducing sugars, also plays a critical role, contributing to the browning and development of complex flavors. Understanding these reactions allows us to control the cooking process and achieve consistent, delicious results.The Ultimate Honey Garlic Chicken Recipe

Ingredients:
- 1.5 lbs boneless, skinless chicken thighs, cut into 1-inch pieces
- 2 tablespoons olive oil
- 6 cloves garlic, minced
- 1/4 cup honey
- 1/4 cup soy sauce (low sodium recommended)
- 2 tablespoons rice vinegar
- 1 tablespoon sesame oil
- 1 teaspoon ginger, grated
- 1/2 teaspoon red pepper flakes (optional, for heat)
- 2 tablespoons cornstarch, mixed with 2 tablespoons cold water (slurry)
- Sesame seeds and chopped green onions, for garnish
Instructions:
- Prepare the Chicken: Pat the chicken pieces dry with paper towels. This helps them brown better.
- Sear the Chicken: Heat the olive oil in a large skillet or wok over medium-high heat. Add the chicken and cook until browned on all sides, about 5-7 minutes. Don’t overcrowd the pan; cook in batches if necessary. Remove the chicken from the skillet and set aside.
- Sauté the Garlic: Reduce the heat to medium and add the minced garlic to the skillet. Cook for about 1 minute, or until fragrant, being careful not to burn it.
- Make the Sauce: Add the honey, soy sauce, rice vinegar, sesame oil, ginger, and red pepper flakes (if using) to the skillet. Stir to combine.
- Thicken the Sauce: Bring the sauce to a simmer and then slowly pour in the cornstarch slurry, stirring constantly, until the sauce thickens, about 1-2 minutes.
- Combine and Simmer: Return the chicken to the skillet and toss to coat with the sauce. Reduce the heat to low, cover, and simmer for 5-7 minutes, or until the chicken is cooked through and the sauce has thickened further.
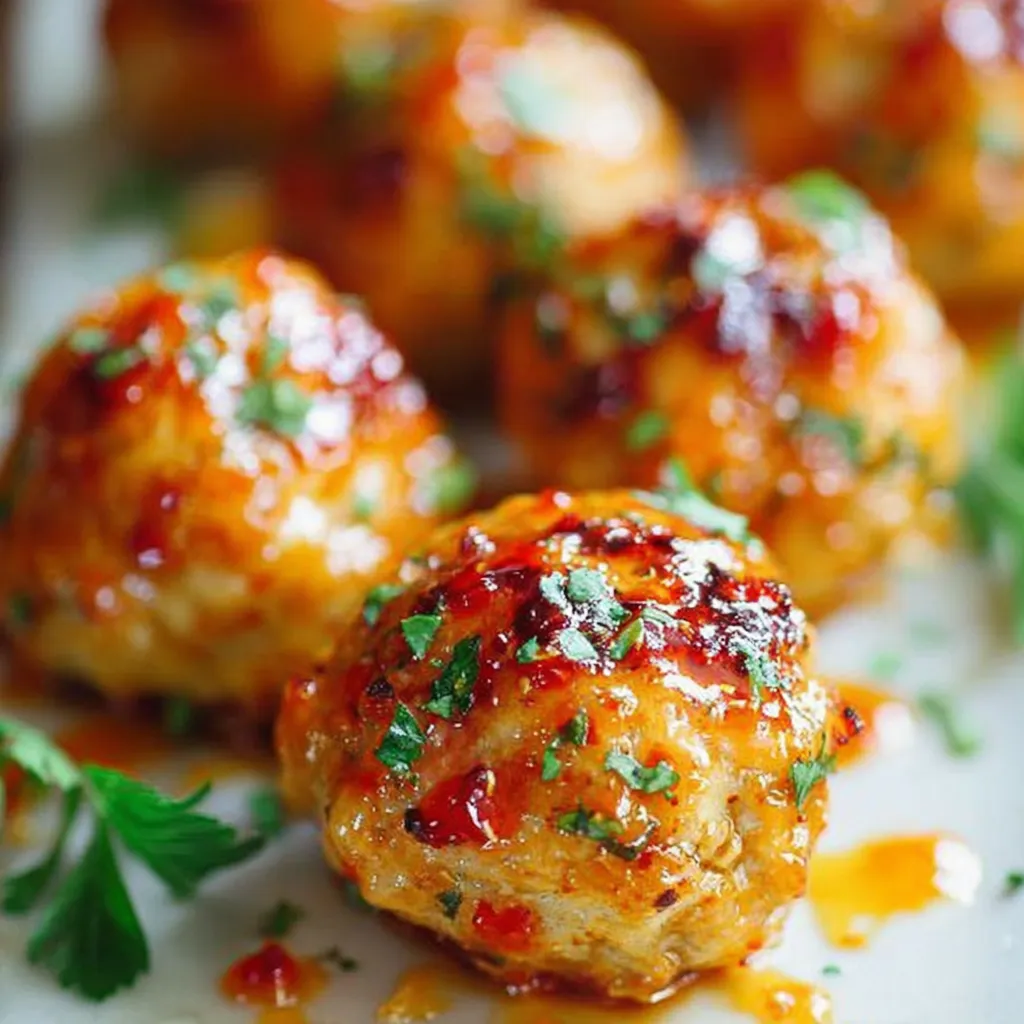
- Garnish and Serve: Garnish with sesame seeds and chopped green onions. Serve hot over rice, noodles, or vegetables.
Honey Garlic Chicken: My Personal Investigation
The Sticky Situation: My First Few Attempts
My first few attempts at making Honey Garlic Chicken were a disaster. The sauce was either too thin and watery or so thick and sticky that it resembled glue more than a glaze. The garlic was often burnt, leaving a bitter aftertaste. I was frustrated and ready to give up, convinced that the perfect Honey Garlic Chicken was an unattainable myth. The recipes I found online were vague and inconsistent, with little explanation of the underlying principles. Like many of you, I initially thought it was just a matter of throwing ingredients together and hoping for the best.The ‘Aha!’ Moment: Understanding the Science
Then, I had an “Aha!” moment. I realized I needed to understand the science behind the sauce. I started researching the Maillard reaction and the properties of honey and garlic. I learned that the key to a balanced sauce was controlling the heat and using the right ratios of ingredients. I experimented with different types of honey, soy sauce, and vinegars, carefully measuring and adjusting the amounts until I achieved the desired flavor profile. I also discovered the importance of using a cornstarch slurry to thicken the sauce, which provided a smooth and consistent texture. It was during this phase I considered trying the Honey Garlic Chicken Instant Pot method.Taming the Thighs: Choosing the Right Chicken Cut
Another crucial aspect was the chicken itself. I initially used chicken breasts, but they often turned out dry and tough. Then I switched to chicken thighs, and the difference was remarkable. Chicken thighs have a higher fat content, which keeps them moist and flavorful during cooking. They also hold up better to the heat and absorb the sauce more effectively. I found that cutting the thighs into smaller pieces ensured even cooking and maximized the surface area for the sauce to cling to. I even experimented with Instant Pot Creamy Garlic Chicken Thighs, but found the stove-top method gave me more control over the sauce reduction.The Ginger Revelation: Adding Depth of Flavor
The final piece of the puzzle was ginger. Initially, I didn’t include ginger in my recipe, but after trying a version with grated ginger, I was blown away by the difference. The ginger added a subtle warmth and complexity that elevated the sauce to another level. It complemented the honey and garlic perfectly, creating a harmonious blend of sweet, savory, and aromatic flavors. It reminded me a lot of the Hot Honey Chicken Bowl, but with its own unique twist.The Foolproof Honey Garlic Chicken Technique
To consistently create Honey Garlic Chicken perfection, follow these steps:- Prep is Key: Cut the chicken thighs into uniform, 1-inch pieces. Mince the garlic and grate the ginger. Measure out all the ingredients before you start cooking.
- Dry the Chicken: Pat the chicken pieces dry with paper towels before searing. This will help them brown better and prevent steaming.
- Don’t Burn the Garlic: Sauté the garlic over medium heat for only about 1 minute, or until fragrant. Burnt garlic will ruin the entire dish.
- Thicken with Slurry: Use a cornstarch slurry (cornstarch mixed with cold water) to thicken the sauce. This will provide a smooth and consistent texture.
- Simmer, Don’t Boil: After adding the chicken to the sauce, reduce the heat to low, cover, and simmer gently. Boiling the sauce can cause it to become too thick and sticky.
- Taste and Adjust: Before serving, taste the sauce and adjust the seasonings as needed. Add more honey for sweetness, soy sauce for saltiness, or rice vinegar for acidity.
- Garnish Generously: Garnish with sesame seeds and chopped green onions for added flavor and visual appeal.
Why is it important to use a cornstarch slurry when making the Honey Garlic Chicken sauce?
A cornstarch slurry (cornstarch mixed with cold water) is crucial for thickening the sauce, providing a smooth and consistent texture, and preventing it from becoming too thin or watery.
Why does the recipe recommend using chicken thighs instead of chicken breasts?
Chicken thighs have a higher fat content than chicken breasts, which keeps them moist and flavorful during cooking. They also hold up better to the heat and absorb the sauce more effectively.
What is the key to preventing the garlic from burning when making Honey Garlic Chicken?
Sauté the minced garlic over medium heat for only about 1 minute, or until fragrant, being careful not to burn it. Burnt garlic will ruin the entire dish.
What’s the best way to ensure the chicken browns properly?
Pat the chicken pieces dry with paper towels before searing. This helps them brown better and prevents steaming.
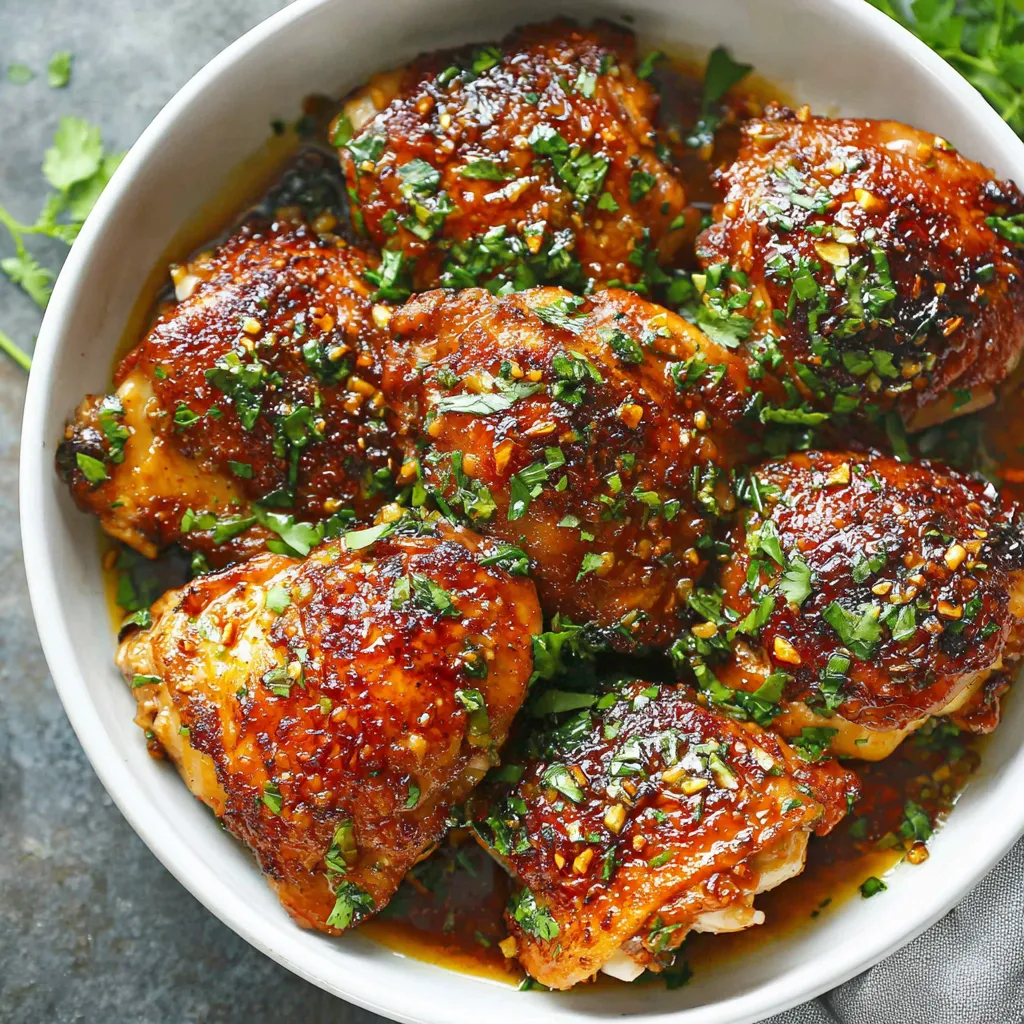
Easy Honey Garlic Chicken
This recipe delivers perfectly balanced honey garlic chicken, avoiding the common pitfalls of overly sticky or bitter sauces. By understanding the science behind the ingredients and following key techniques, you can achieve a delicious and consistently flavorful dish.
Ingredients
Equipment
Method
- Pat the chicken pieces dry with paper towels.
- Heat the olive oil in a large skillet or wok over medium-high heat.
- Add the chicken and cook until browned on all sides, about 5-7 minutes. Cook in batches if necessary to avoid overcrowding the pan. Remove and set aside.
- Reduce the heat to medium and add the minced garlic to the skillet. Cook for about 1 minute, or until fragrant, being careful not to burn it.
- Add the honey, soy sauce, rice vinegar, sesame oil, ginger, and red pepper flakes (if using) to the skillet. Stir to combine.
- Bring the sauce to a simmer and then slowly pour in the cornstarch slurry (cornstarch mixed with cold water), stirring constantly, until the sauce thickens, about 1-2 minutes.
- Return the chicken to the skillet and toss to coat with the sauce.
- Reduce the heat to low, cover, and simmer for 5-7 minutes, or until the chicken is cooked through and the sauce has thickened further.
- Garnish with sesame seeds and chopped green onions.
- Serve hot over rice, noodles, or vegetables.
Notes
For a sweeter sauce, add more honey to taste. For a saltier sauce, add more soy sauce. To store leftovers, refrigerate in an airtight container for up to 3 days. Reheat gently on the stovetop or in the microwave. Chicken breasts can be used, but thighs are recommended for a juicier result. Adjust red pepper flakes to control the level of spice. Taste and adjust seasonings as needed before serving.

")