
Decoding the Sweet & Savory Symphony: The Science Behind Honey Garlic Chicken
The magic of honey garlic chicken lies in a delicate balance of chemical reactions. The Maillard reaction, responsible for browning and flavor development, is key. This occurs when amino acids (from the chicken) and reducing sugars (from the honey) are heated. However, honey is largely fructose and glucose, which caramelize at different rates and burn easily. Garlic, with its sulfur compounds, adds another layer of complexity. Overcooked garlic becomes bitter. Therefore, the goal is to achieve a deep, rich color and complex flavor without burning the honey or the garlic. Acids, like soy sauce and vinegar, play another crucial role. They tenderize the chicken, balance the sweetness of the honey, and contribute to the umami flavor that makes the dish so irresistible. The right ratio of acid to sugar is paramount; too little acid results in cloying sweetness, while too much will create a sour or vinegary taste. Understanding these chemical processes allows us to control the cooking and consistently achieve optimal results.The Recipe: Honey Garlic Chicken Amazing Recipe
 This recipe is the culmination of numerous experiments, failures, and finally, success! It prioritizes flavor development, even cooking, and a perfectly balanced sauce.
Ingredients:
- 1.5 lbs boneless, skinless chicken thighs, cut into 1-inch pieces
- 2 tablespoons soy sauce
- 1 tablespoon rice vinegar
- 1 tablespoon cornstarch
- 2 tablespoons olive oil
- 6 cloves garlic, minced
- 1/4 cup honey
- 2 tablespoons brown sugar
- 1 tablespoon ketchup
- 1/2 teaspoon red pepper flakes (optional)
- Sesame seeds and chopped green onions for garnish
Instructions:
- Marinate the Chicken: In a bowl, combine the chicken, 1 tablespoon soy sauce, 1 tablespoon rice vinegar, and cornstarch. Mix well and let it marinate for at least 20 minutes (or up to 2 hours in the refrigerator).
- Sear the Chicken: Heat 1 tablespoon of olive oil in a large skillet or wok over medium-high heat. Add the chicken in a single layer (work in batches if necessary to avoid overcrowding) and sear for 2-3 minutes per side, until golden brown. Remove the chicken from the skillet and set aside.
- Sauté the Garlic: Add the remaining 1 tablespoon of olive oil to the skillet. Reduce the heat to medium and add the minced garlic. Sauté for about 30 seconds, or until fragrant, being careful not to burn it.
- Make the Sauce: In a small bowl, whisk together the honey, brown sugar, remaining 1 tablespoon soy sauce, ketchup, and red pepper flakes (if using).
- Simmer and Thicken: Pour the honey garlic sauce into the skillet with the garlic. Bring to a simmer, stirring constantly. Cook for 2-3 minutes, or until the sauce thickens slightly.
- Combine and Coat: Add the seared chicken back to the skillet and toss to coat it evenly with the honey garlic sauce. Continue to cook for another 2-3 minutes, allowing the sauce to cling to the chicken and glaze it beautifully.
- Garnish and Serve: Remove from heat and garnish with sesame seeds and chopped green onions. Serve immediately over rice or noodles.
The Investigation: My Quest for Honey Garlic Chicken Nirvana
My first few attempts were a disaster. I remember thinking, “How hard can it be?” Famous last words. The initial results were either sickeningly sweet or tasted like burnt garlic candy. The chicken was either dry and overcooked or pale and undercooked. I was determined to crack the code.The Burnt Sugar Fiasco
Like many of you, I initially thought throwing everything into a pan at once was the way to go. Big mistake! The honey burned before the chicken even had a chance to brown. The garlic became acrid. The flavor was overwhelmingly bitter. I realized I needed to control the cooking process, starting with searing the chicken first. This gave it a chance to develop that crucial Maillard reaction without risking burning the honey.The Garlic Gamble
Another challenge was the garlic. I love garlic, but burnt garlic? Not so much. I tried adding it at different stages. Adding it at the beginning, along with the honey, resulted in a burnt mess. Adding it at the end yielded a raw, overpowering flavor. Then, I had an “Aha!” moment: sautéing the garlic gently in oil before adding the honey allowed its flavor to infuse the oil without burning. This delicate sautéing, for just 30 seconds, was the key.The Sweetness Showdown
Balancing the sweetness of the honey was another hurdle. Early attempts were far too sugary. I experimented with different acids: lemon juice, lime juice, even a splash of apple cider vinegar. Ultimately, I found that a combination of soy sauce and rice vinegar provided the perfect counterpoint to the honey’s sweetness. The soy sauce added umami, while the rice vinegar provided a subtle tang. I also found that a bit of ketchup provided even more depth.The Chicken Conundrum
Finally, the chicken itself. I initially used chicken breasts, but they tended to dry out. Switching to chicken thighs was a game-changer. The thighs remained moist and tender, even when cooked a bit longer. Marinating the chicken beforehand, even for just 20 minutes, also made a significant difference in tenderness and flavor. And let’s not forget the impact of Honey Garlic Chicken – a simpler version helped me understand the core flavor profiles.The Technique: The Foolproof Honey Garlic Chicken Method
Here’s the step-by-step guide to achieving perfect honey garlic chicken every time:- Marinate the Chicken: This tenderizes the chicken and infuses it with flavor. Don’t skip this step!
- Sear the Chicken: Sear the chicken first to develop a golden-brown crust and lock in moisture. Work in batches to avoid overcrowding the pan. Thinking back to my experiments, it reminded me of the crucial first step in making great Honey Pepper Chicken, building a flavorful base.
- Sauté the Garlic: Sauté the minced garlic gently in oil over medium heat until fragrant, about 30 seconds. Watch it carefully to prevent burning.
- Build the Sauce: Whisk together the honey, brown sugar, soy sauce, ketchup, and red pepper flakes (if using) in a separate bowl. This ensures that all the ingredients are evenly distributed.
- Simmer and Thicken: Pour the sauce into the skillet with the garlic and simmer until it thickens slightly.
- Combine and Glaze: Add the seared chicken back to the skillet and toss to coat it evenly with the sauce. Cook for a few more minutes until the chicken is fully cooked and the sauce is beautifully glazed. This step is similar to achieving that perfect glaze in Honey Garlic Chicken And Broccoli Stir-fry, where the sauce needs to coat everything perfectly.
- Garnish and Serve: Garnish with sesame seeds and chopped green onions. Serve immediately over rice or noodles. This brings the dish to life visually and adds a fresh element, much like the garnishes elevate Garlic Chicken Wraps.
Why is marinating the chicken important in this honey garlic chicken recipe?
Marinating the chicken tenderizes it and infuses it with flavor. The recipe suggests marinating for at least 20 minutes or up to 2 hours.
What is the key to preventing the honey and garlic from burning in the honey garlic chicken recipe?
The key is to sear the chicken first, then sauté the garlic gently in oil for only about 30 seconds before adding the honey sauce. This prevents the garlic from burning and allows its flavor to infuse the oil. The honey is added later in a sauce, minimizing its burn time.
Why does the recipe call for chicken thighs instead of chicken breasts?
Chicken thighs are used because they remain moist and tender even when cooked a bit longer, unlike chicken breasts, which tend to dry out.
What is the purpose of adding soy sauce and rice wine vinegar to the honey garlic chicken sauce?
Soy sauce and rice vinegar balance the sweetness of the honey. The soy sauce adds umami flavor, while the rice vinegar provides a subtle tang.
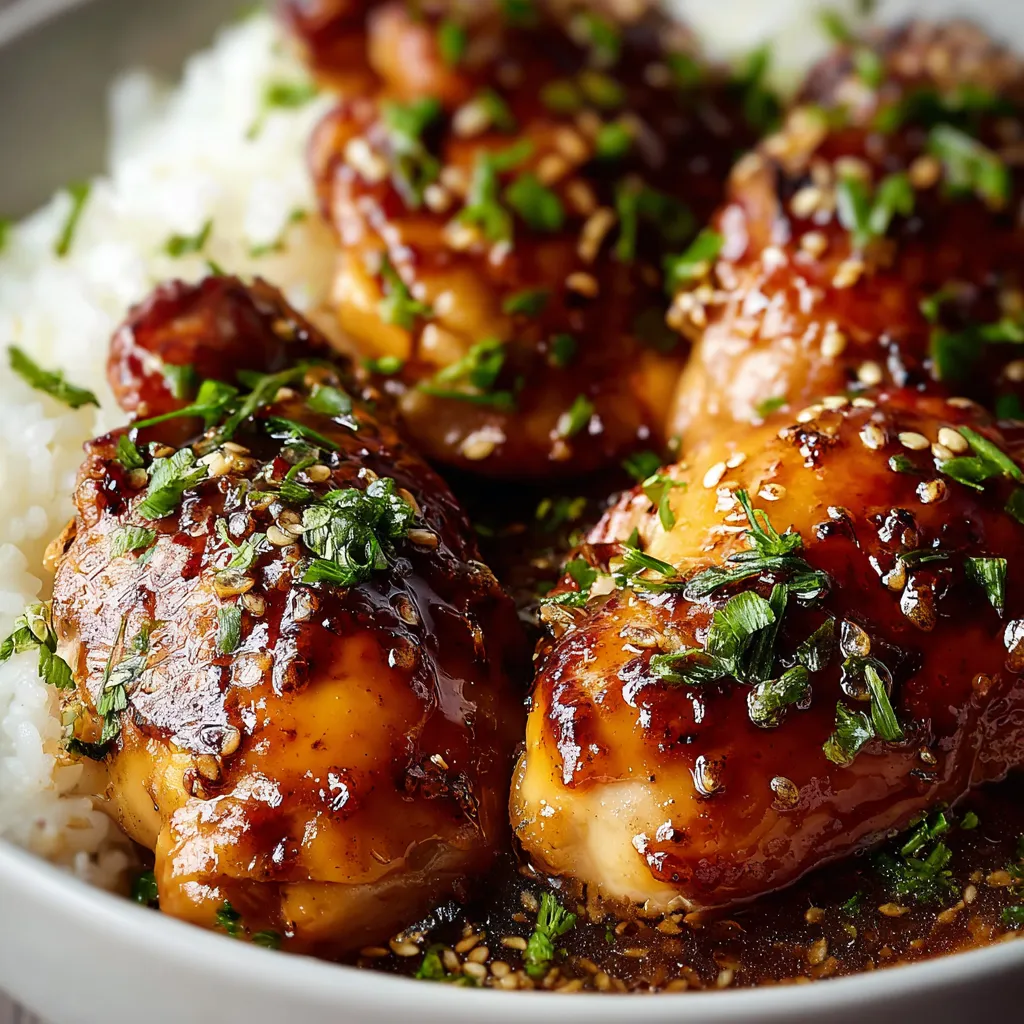
Honey Garlic Chicken
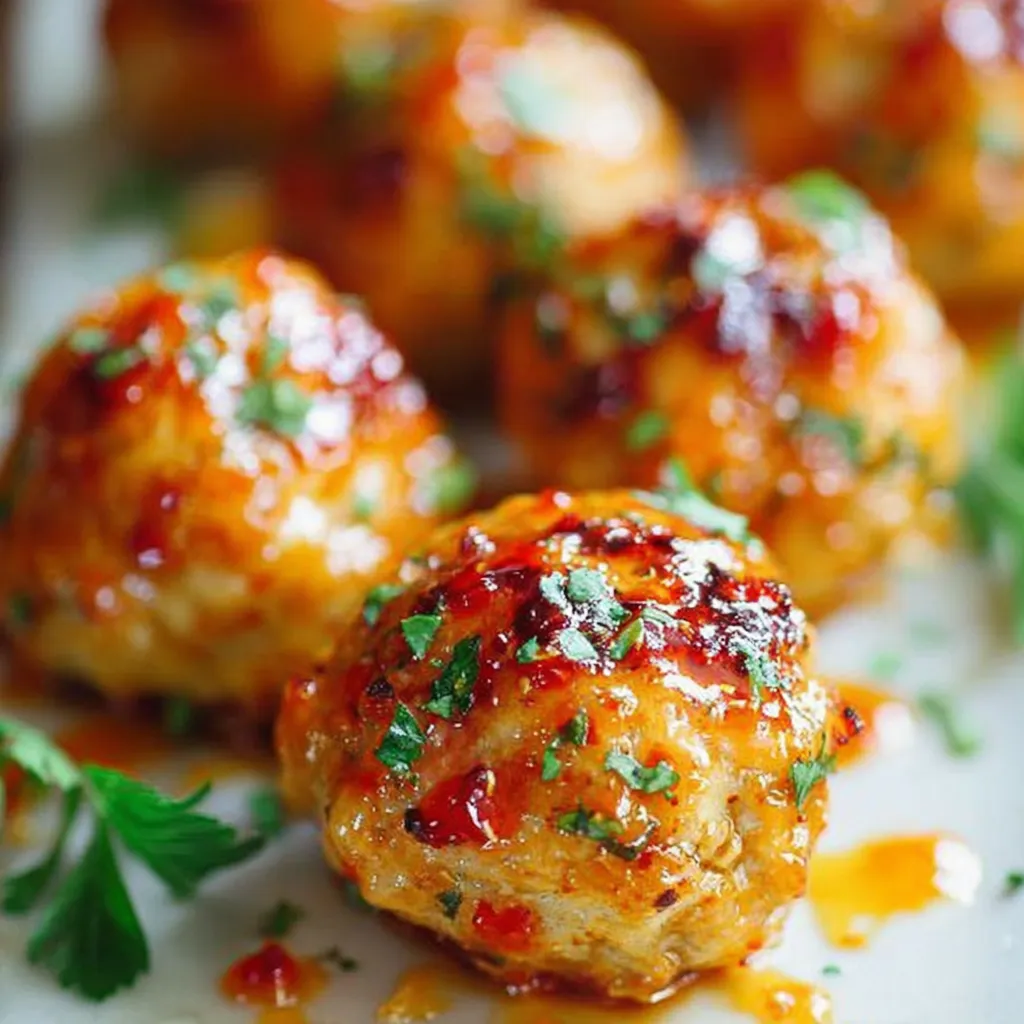
This Honey Garlic Chicken recipe delivers a perfectly balanced sweet and savory flavor with tender, juicy chicken. The chicken is marinated, seared, and then coated in a delicious honey garlic sauce, ensuring a beautiful glaze and irresistible taste. Garnish with sesame seeds and green onions for an extra touch of freshness.
Ingredients
Equipment
Method
- Marinate the Chicken: In a bowl, combine the chicken, 1 tablespoon soy sauce, 1 tablespoon rice vinegar, and cornstarch. Mix well and let it marinate for at least 20 minutes (or up to 2 hours in the refrigerator).
- Sear the Chicken: Heat 1 tablespoon of olive oil in a large skillet or wok over medium-high heat. Add the chicken in a single layer (work in batches if necessary to avoid overcrowding) and sear for 2-3 minutes per side, until golden brown. Remove the chicken from the skillet and set aside.
- Sauté the Garlic: Add the remaining 1 tablespoon of olive oil to the skillet. Reduce the heat to medium and add the minced garlic. Sauté for about 30 seconds, or until fragrant, being careful not to burn it.
- Make the Sauce: In a small bowl, whisk together the honey, brown sugar, remaining 1 tablespoon soy sauce, ketchup, and red pepper flakes (if using).
- Simmer and Thicken: Pour the honey garlic sauce into the skillet with the garlic. Bring to a simmer, stirring constantly. Cook for 2-3 minutes, or until the sauce thickens slightly.
- Combine and Coat: Add the seared chicken back to the skillet and toss to coat it evenly with the honey garlic sauce. Continue to cook for another 2-3 minutes, allowing the sauce to cling to the chicken and glaze it beautifully.
- Garnish and Serve: Remove from heat and garnish with sesame seeds and chopped green onions. Serve immediately over rice or noodles.
Notes
For best results, use high-quality honey and soy sauce. To prevent the garlic from burning, keep the heat at medium and watch it carefully. Leftovers can be stored in an airtight container in the refrigerator for up to 3 days. Reheat gently on the stovetop or in the microwave. For a spicier dish, increase the amount of red pepper flakes. You can also add a splash of sesame oil to the sauce for extra flavor.

")