
The Alchemy of Deliciousness: Unveiling the Secrets
At its heart, a great Cheesy Garlic Chicken Wrap hinges on three key scientific principles: moisture retention, Maillard reaction, and emulsification. Moisture retention in the chicken is crucial. Overcooked chicken is dry and unappetizing, no matter how much garlic you add. The Maillard reaction, that beautiful browning that happens when proteins and sugars are heated, contributes significantly to flavor development. And finally, emulsification, the blending of oil and water-based liquids (like in a garlic butter sauce), creates a smooth, rich coating that binds everything together. Understanding these principles is half the battle.The Recipe: Your Gateway to Cheesy Garlic Bliss
 Here’s a recipe I’ve painstakingly refined to consistently deliver perfect Cheesy Garlic Chicken Wraps:
Yields
- 4 wraps
Prep Time
- 20 minutes
Cook Time
- 25 minutes
Ingredients
- 1.5 lbs boneless, skinless chicken breasts, cut into 1-inch cubes
- 4 large flour tortillas
- 8 oz shredded mozzarella cheese
- 4 oz cream cheese, softened
- 1/4 cup grated Parmesan cheese
- 2 tbsp olive oil
- 4 cloves garlic, minced
- 1/4 cup butter
- 1/4 cup chopped fresh parsley
- 1 tbsp lemon juice
- 1 tsp garlic powder
- 1/2 tsp onion powder
- 1/4 tsp red pepper flakes (optional)
- Salt and black pepper to taste
Equipment
- Large skillet
- Mixing bowl
- Cutting board
- Knife
- Measuring cups and spoons
Instructions
- Prepare the Chicken: In a mixing bowl, toss the chicken cubes with olive oil, garlic powder, onion powder, salt, and pepper.
- Cook the Chicken: Heat the remaining butter in a large skillet over medium-high heat. Add the chicken and cook until browned and cooked through, about 6-8 minutes. Ensure the internal temperature reaches 165°F (74°C).
- Make the Garlic Sauce: Reduce heat to medium-low. Add the minced garlic to the skillet and cook for about 1 minute, until fragrant. Be careful not to burn the garlic. Stir in the lemon juice and parsley.
- Assemble the Wraps: Warm the tortillas in a dry skillet or microwave for a few seconds to make them more pliable. Spread a thin layer of softened cream cheese over each tortilla.
- Add Fillings: Divide the cooked chicken evenly among the tortillas. Top with mozzarella and Parmesan cheese.
- Fold the Wraps: Fold in the sides of the tortilla, then tightly roll it up from the bottom.
- Toast the Wraps: Heat a clean skillet over medium heat. Place the wraps in the skillet, seam-side down, and cook for 2-3 minutes per side, or until golden brown and the cheese is melted and gooey.
- Serve: Slice the wraps in half and serve immediately.
My Cheesy Garlic Chicken Wrap Odyssey: A Culinary Confession
My journey to Cheesy Garlic Chicken Wrap perfection was not a straight path. It was filled with soggy tortillas, bland chicken, and garlic that tasted more burnt than buttery.The Tortilla Trauma
My first few attempts were a disaster because the tortillas always fell apart. I initially thought it was just bad luck, but then I realized they were absorbing too much moisture from the chicken and sauce. The Cheesy Garlic Chicken Wraps I was making were simply too wet! The “Aha!” moment came when I pre-warmed the tortillas. This not only made them more pliable but also created a slight barrier against the moisture.The Chicken Conundrum
Like many of you, I initially thought any old chicken would do. But I soon discovered that using pre-cooked chicken or chicken that was previously frozen resulted in a dry, lackluster wrap. The key, I found, was to use fresh chicken breasts, cut them into uniform sizes for even cooking, and sear them quickly over high heat to lock in the juices. That’s when I started drawing inspiration from my Honey Garlic Chicken recipe.The Garlic Gamble
Ah, the garlic. It’s the star of the show, but also the easiest to mess up. Burnt garlic is a flavor killer. I tried adding the garlic at different stages of cooking, but nothing seemed to work consistently. Then, I realized the secret was to add the garlic *after* the chicken was cooked and the heat was reduced. This way, the garlic infused the sauce with its pungent aroma without turning bitter. I started experimenting with variations, even considering the principles behind Garlic Parmesan Chicken Recipe.The Cheese Quagmire
The cheese! An integral component, yet another source of frustration. Getting the right cheese blend and ensuring it melted evenly was a challenge. Too much mozzarella and the wrap became rubbery. Not enough Parmesan and it lacked that sharp, nutty flavor. The solution? A combination of both, with a touch of softened cream cheese to add a creamy, luxurious texture. When I compare my method to others making Honey Garlic Chicken Breasts I see many skip the cream cheese altogether. It adds so much!The Ultimate Technique: A Step-by-Step Guide to Wrap Perfection
After countless iterations and a few late-night wrap-making sessions, I’ve distilled the process down to a foolproof technique:- Marinate Smartly: Don’t over-marinate your chicken. A quick toss with olive oil and spices is enough.
- Sear, Don’t Boil: Cook the chicken over medium-high heat to get a good sear and lock in moisture.
- Garlic Timing is Key: Add the minced garlic *after* the chicken is cooked and the heat is reduced to medium-low.
- Warm Those Tortillas: Pre-warm the tortillas in a dry skillet or microwave.
- Cream Cheese First: Spread a thin layer of softened cream cheese on the tortilla before adding other fillings. This prevents the tortilla from getting soggy.
- Cheese Synergy: Use a combination of mozzarella and Parmesan cheese, with a touch of cream cheese for a creamy texture.
- Don’t Overfill: Resist the urge to overstuff the wraps. Less is more when it comes to achieving a tightly rolled, perfectly cooked wrap.
- Toast to Perfection: Toast the assembled wraps in a clean skillet over medium heat until golden brown and the cheese is melted.
- Slice and Serve Immediately: Cut the wraps in half and serve them hot.
What are the three key scientific principles mentioned that contribute to a great Cheesy Garlic Chicken Wrap?
The three key scientific principles are moisture retention (in the chicken), the Maillard reaction (for flavor development), and emulsification (for a smooth, rich sauce).
Why is it important to warm the tortillas before assembling the wraps?
Warming the tortillas makes them more pliable and creates a slight barrier against moisture, preventing them from becoming soggy.
When should I add the minced garlic to the skillet for the best flavor?
Add the minced garlic *after* the chicken is cooked and the heat is reduced to medium-low. This allows the garlic to infuse the sauce with its aroma without burning and becoming bitter.
What kind of cheese blend is recommended and why?
A combination of mozzarella, Parmesan, and cream cheese is recommended. Mozzarella provides the gooey melt, Parmesan adds a sharp, nutty flavor, and cream cheese adds a creamy, luxurious texture.
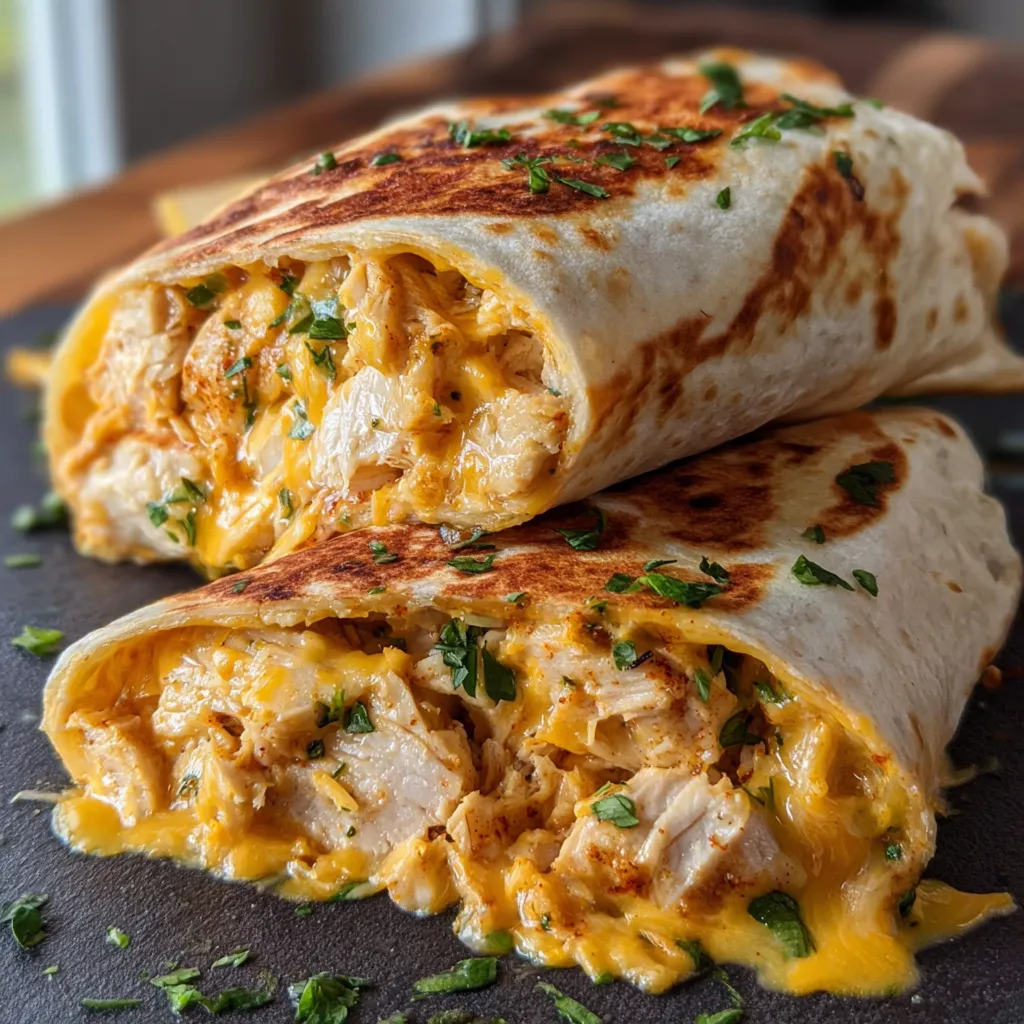
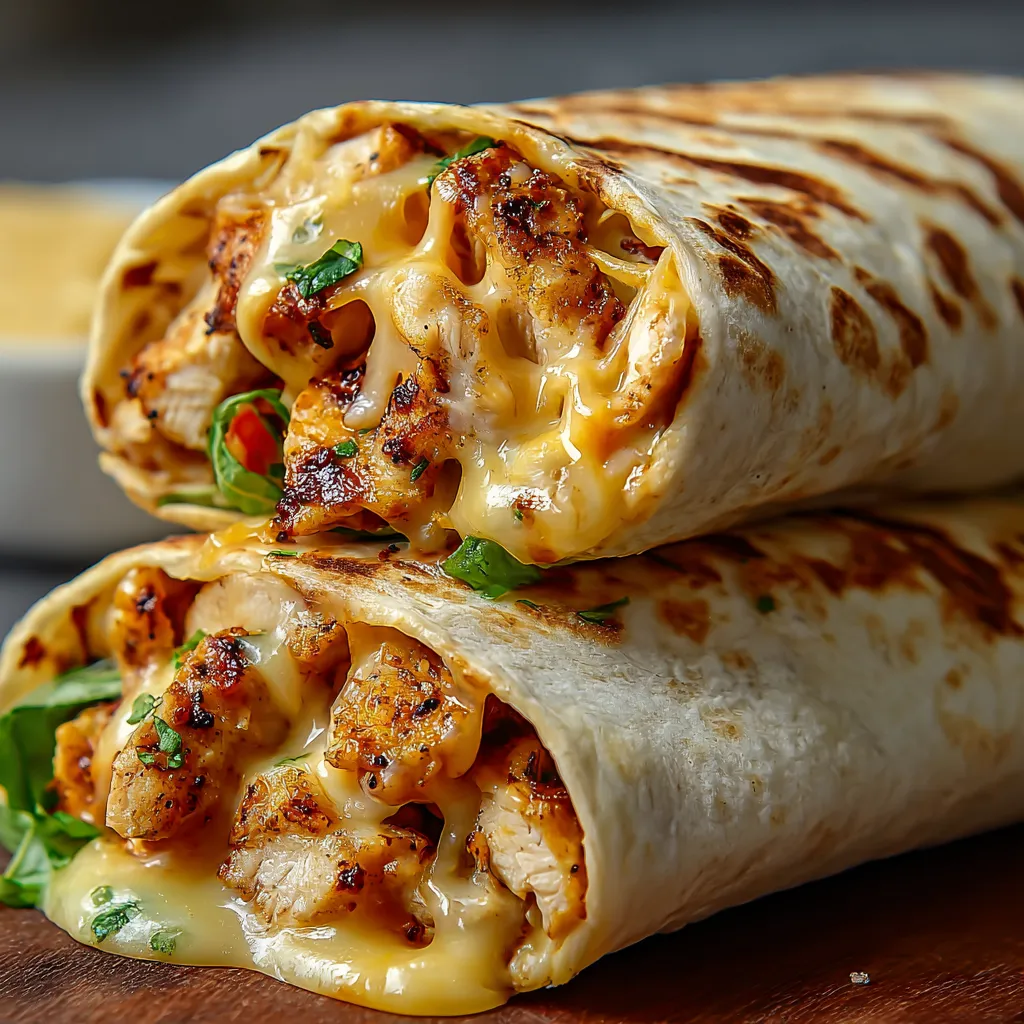
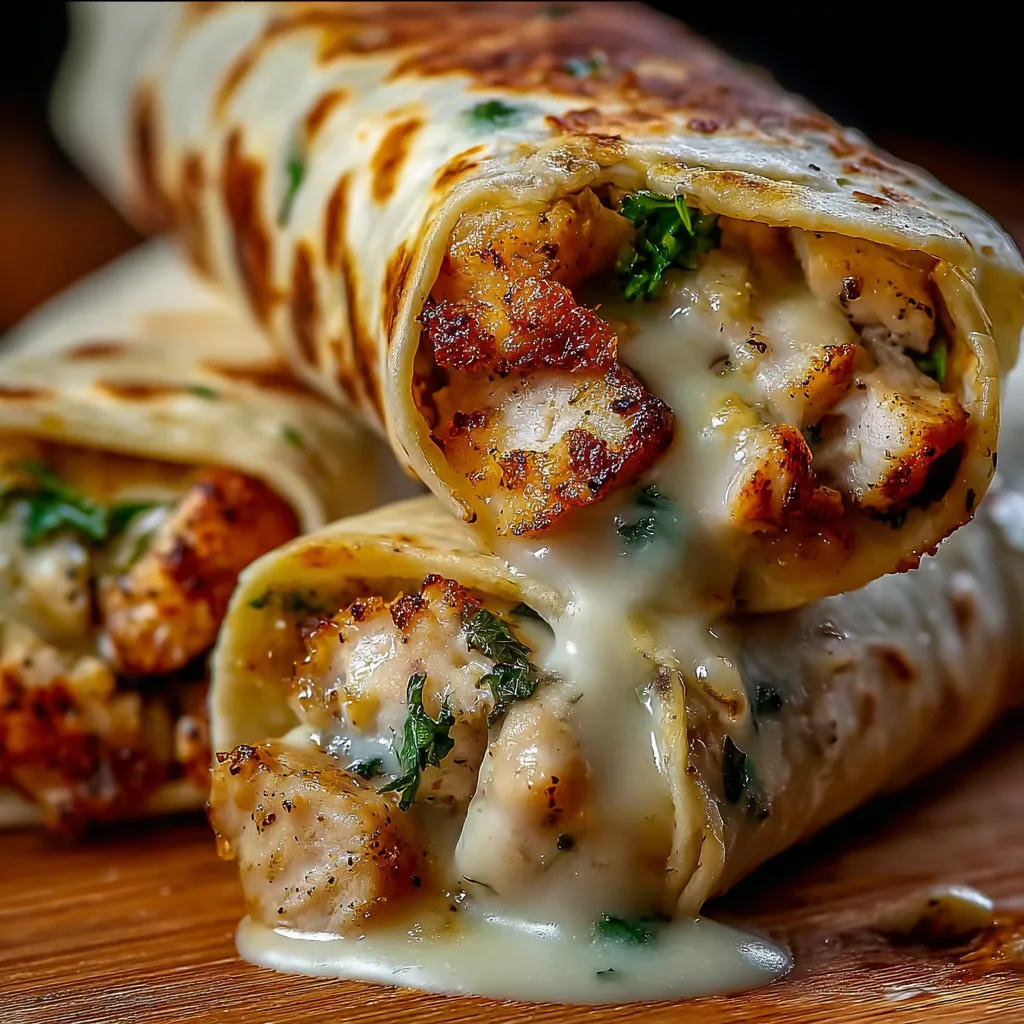
Perfect Cheesy Garlic Chicken Wraps
These Cheesy Garlic Chicken Wraps deliver a restaurant-quality experience at home. Juicy chicken, melty cheese, and a burst of garlic flavor combine for a satisfying and flavorful meal. This recipe provides clear steps for achieving perfectly cooked chicken, a creamy garlic sauce, and golden-brown, toasted tortillas.
Ingredients
Equipment
Method
- Prepare the Chicken: In a mixing bowl, toss the chicken cubes with olive oil, garlic powder, onion powder, salt, and pepper.
- Cook the Chicken: Heat the butter in a large skillet over medium-high heat. Add the chicken and cook until browned and cooked through, about 6-8 minutes. Ensure the internal temperature reaches 165°F (74°C).
- Make the Garlic Sauce: Reduce heat to medium-low. Add the minced garlic to the skillet and cook for about 1 minute, until fragrant. Be careful not to burn the garlic. Stir in the lemon juice and parsley.
- Assemble the Wraps: Warm the tortillas in a dry skillet or microwave for a few seconds to make them more pliable. Spread a thin layer of softened cream cheese over each tortilla.
- Add Fillings: Divide the cooked chicken evenly among the tortillas. Top with mozzarella and Parmesan cheese.
- Fold the Wraps: Fold in the sides of the tortilla, then tightly roll it up from the bottom.
- Toast the Wraps: Heat a clean skillet over medium heat. Place the wraps in the skillet, seam-side down, and cook for 2-3 minutes per side, or until golden brown and the cheese is melted and gooey.
- Serve: Slice the wraps in half and serve immediately.
Notes
For best results, use fresh chicken breasts. Warm the tortillas before filling to prevent sogginess. Add the garlic after the chicken is cooked to avoid burning it. Don’t overfill the wraps for easy rolling and even cooking. Store leftover wraps in the refrigerator for up to 2 days. Reheat in a skillet or microwave.


")