
The Cheesy Garlic Alchemy: Unlocking the Flavor Secrets
The secret to truly exceptional Cheesy Garlic Chicken Wraps lies in understanding the interplay of a few key elements. First, the Maillard reaction, that beautiful browning process that develops complex, savory flavors when proteins and sugars are heated. We need to coax this reaction out of the chicken and the garlic without burning either. Second, the emulsification of the garlic-infused oil or butter. This ensures that the garlic flavor is evenly distributed throughout the chicken and doesn’t just clump in one spot. Finally, the melting point of the cheese. Choosing the right cheese and ensuring it melts uniformly without becoming oily is crucial for that gooey, satisfying texture. Many recipes focus on just one of these aspects, leaving the end result somewhat lacking. If you want to experience amazing Cheesy Garlic Chicken Wraps then you need to learn how to master these things.The Ultimate Cheesy Garlic Chicken Wrap Recipe: A Detailed Guide
 This recipe is designed to be repeatable and adaptable to your personal preferences. We’ll focus on achieving that perfect balance of flavor and texture, addressing each element individually.
Ingredients:
- Chicken: 1.5 lbs boneless, skinless chicken breasts, cut into 1-inch cubes
- Garlic: 6 cloves, minced (fresh is essential!)
- Olive Oil/Butter: 2 tbsp olive oil OR 2 tbsp butter (or a combination)
- Cheese: 1 cup shredded mozzarella cheese (low-moisture, part-skim works best)
- Seasoning: 1 tsp salt, 1/2 tsp black pepper, 1/2 tsp garlic powder, 1/4 tsp red pepper flakes (optional)
- Wraps: 6 large flour tortillas (10-12 inch)
- Optional Add-ins: Chopped spinach, diced tomatoes, sliced red onion, avocado slices, ranch dressing, hot sauce
Instructions:
- Prepare the Chicken: Pat the chicken cubes dry with paper towels. This is crucial for achieving a good sear. In a bowl, toss the chicken with salt, pepper, and garlic powder.
- Garlic Infusion: Heat the olive oil or butter (or both) in a large skillet over medium heat. Add the minced garlic and cook, stirring constantly, until fragrant and lightly golden, about 1-2 minutes. Be careful not to burn the garlic! Remove the garlic from the skillet and set aside. Reserve the garlic-infused oil/butter in the skillet.
- Sear the Chicken: Increase the heat to medium-high. Add the chicken cubes to the skillet in a single layer, being careful not to overcrowd the pan. Sear the chicken on all sides until golden brown and cooked through, about 5-7 minutes total. If necessary, cook in batches to avoid overcrowding.
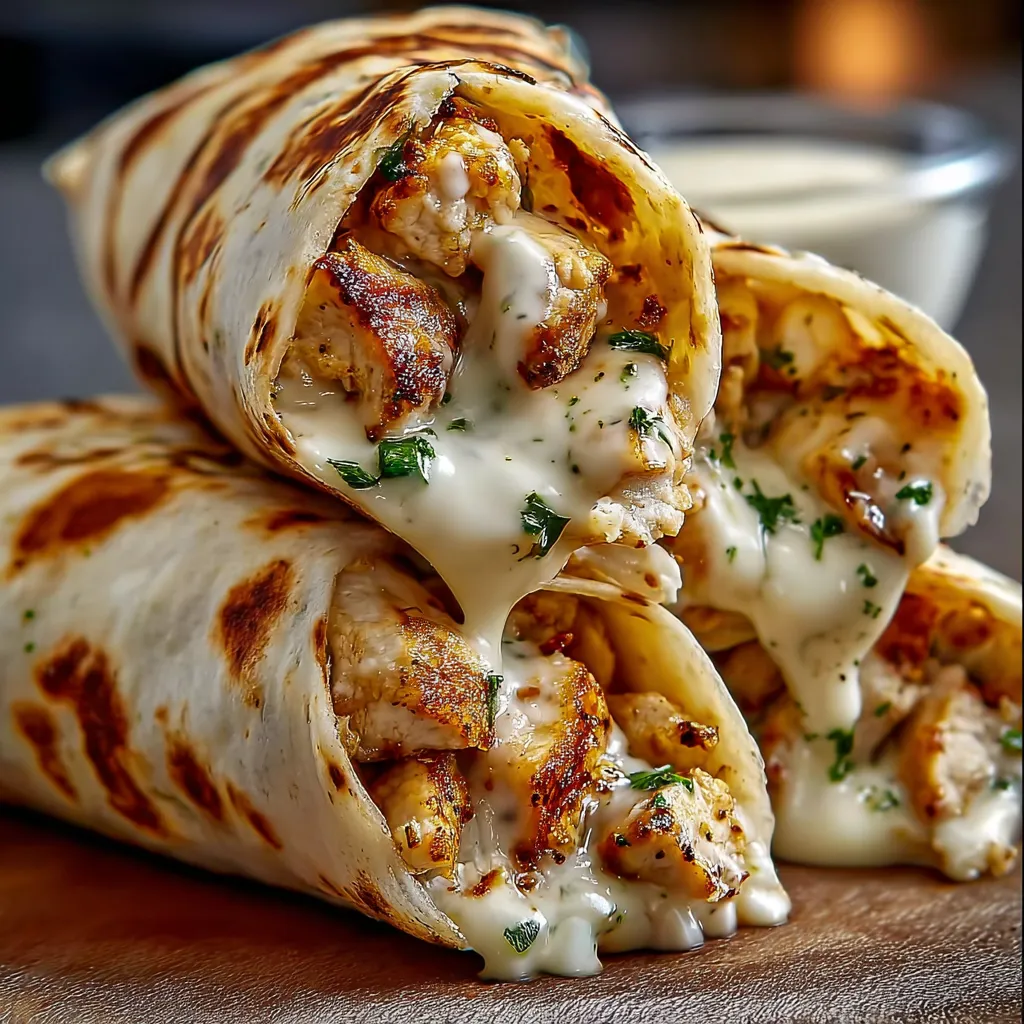
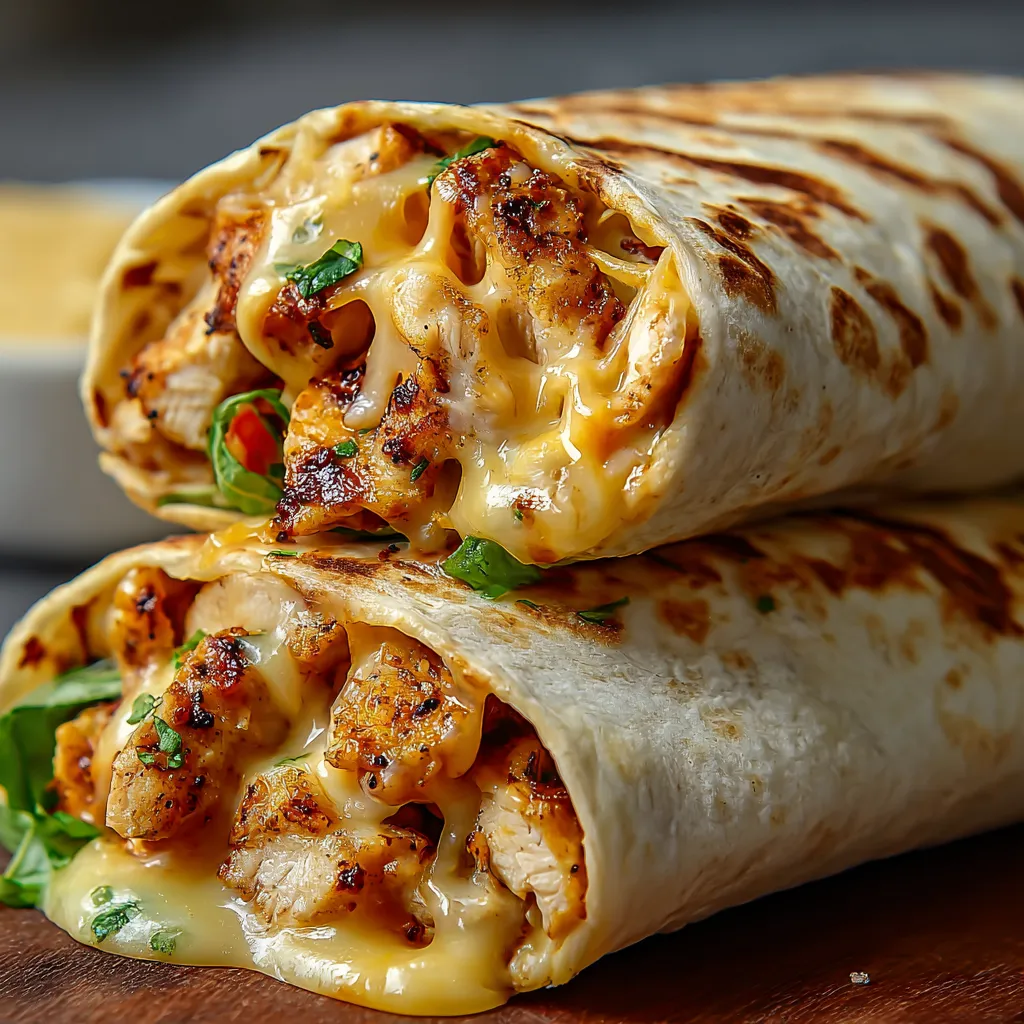
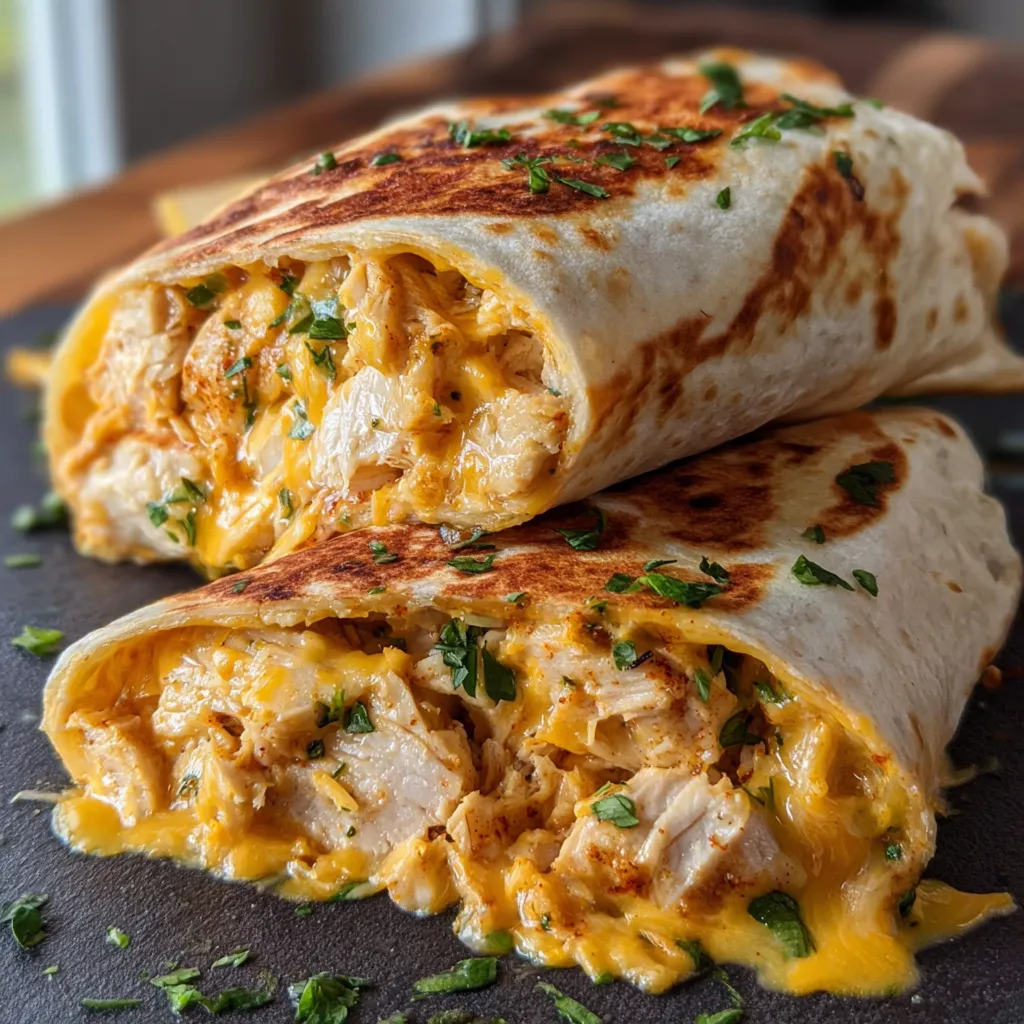
- Combine and Melt: Reduce the heat to low. Add the cooked garlic back to the skillet with the chicken. Stir to combine. Sprinkle the mozzarella cheese evenly over the chicken. Cover the skillet and cook until the cheese is melted and gooey, about 2-3 minutes.
- Assemble the Wraps: Warm the tortillas according to package directions (microwave or dry skillet). Place a generous portion of the cheesy garlic chicken mixture in the center of each tortilla. Add any desired optional add-ins.
- Wrap it Up: Fold in the sides of the tortilla and then roll it up tightly from the bottom.
- Serve Immediately: Serve the Cheesy Garlic Chicken Wraps immediately. For an extra crispy tortilla, you can lightly grill the wrapped wraps in the same skillet for a minute or two per side.
The Great Cheesy Garlic Chicken Wrap Experiment: My Culinary Journey
My first few attempts at making cheesy garlic chicken wraps were, to put it mildly, a complete disaster. Like many of you, I initially thought it was just a matter of throwing some ingredients together and hoping for the best. The chicken was either dry and overcooked, or the garlic was burnt and bitter, or the cheese was a greasy, separated mess. It was frustrating!The Burnt Garlic Debacle
Initially, I was adding the garlic at the same time as the chicken, figuring it would all cook together. Big mistake! Garlic burns much faster than chicken, resulting in a bitter, unpleasant flavor that permeated the entire wrap.The Dry Chicken Dilemma
Then, I tried cooking the chicken separately, but I wasn’t patting it dry beforehand. This resulted in the chicken steaming instead of searing, leading to a pale, rubbery texture. The Chicken Wraps I was making were not what I wanted.The Greasy Cheese Catastrophe
I experimented with different types of cheese, thinking that would solve the problem. I used full-fat mozzarella, assuming it would melt the best. While it did melt beautifully, it also released a ton of oil, resulting in a greasy, unappetizing wrap. This was not the tasty Chicken Mozzarella Wraps I envisioned.The “Aha!” Moment
Then, I had an “Aha!” moment. I realized that each ingredient needed to be treated with respect and cooked in a way that maximized its flavor and texture. I started by pre-cooking the garlic in oil or butter and then removing it to prevent burning. I made sure to pat the chicken dry before searing it in a hot pan. And I switched to low-moisture, part-skim mozzarella, which melted beautifully without releasing excessive oil. The change was night and day. I finally achieved that perfect balance of juicy chicken, aromatic garlic, and gooey cheese. Then the idea came to use the recipe to create Garlic Chicken Wraps with the addition of cheesy goodness.The Foolproof Cheesy Garlic Chicken Wrap Technique: A Summary
Here’s a step-by-step guide to ensure your cheesy garlic chicken wraps are a success every time:- Pat the Chicken Dry: This is non-negotiable. Dry chicken sears, wet chicken steams.
- Gently Sauté the Garlic: Cook the minced garlic in oil or butter over medium heat until fragrant and lightly golden. Remove from the skillet to prevent burning. The aromatic flavors will be much more vibrant.
- Sear the Chicken in a Hot Pan: Don’t overcrowd the pan! Sear the chicken in batches to ensure even browning.
- Use Low-Moisture, Part-Skim Mozzarella: This cheese melts beautifully without becoming greasy.
- Cover and Melt: Once the chicken is cooked and the garlic is added back, sprinkle with cheese, cover the skillet, and let the cheese melt completely.
- Warm the Tortillas: Warm tortillas are more pliable and easier to wrap.
- Assemble with Care: Don’t overfill the wraps, and fold them tightly for a neat and tidy presentation.
What’s the secret to making amazing cheesy garlic chicken wraps?
The secret lies in understanding the interplay of the Maillard reaction (browning), emulsification of garlic flavor, and the melting point of the cheese. Each element needs to be properly addressed to achieve the perfect balance of flavor and texture.
Why is it important to pat the chicken dry before searing it?
Patting the chicken dry is crucial because dry chicken sears, while wet chicken steams. Searing creates a desirable golden-brown crust and locks in the juices, resulting in a more flavorful and texturally pleasing wrap.
What type of mozzarella cheese is recommended for these wraps and why?
Low-moisture, part-skim mozzarella is recommended. It melts beautifully without releasing excessive oil, preventing the wraps from becoming greasy.
How do you prevent the garlic from burning when cooking the chicken?
Cook the minced garlic in olive oil or butter over medium heat until fragrant and lightly golden (about 1-2 minutes). Then, remove the garlic from the skillet and set it aside before searing the chicken. Add the cooked garlic back in later to combine flavors without burning.
Amazing Cheesy Garlic Chicken Wraps
Ingredients
Equipment
Method
- Pat the chicken cubes dry with paper towels. In a bowl, toss the chicken with salt, pepper, and garlic powder.
- Heat the olive oil or butter in a large skillet over medium heat. Add the minced garlic and cook, stirring constantly, until fragrant and lightly golden, about 1-2 minutes. Be careful not to burn the garlic! Remove the garlic from the skillet and set aside. Reserve the garlic-infused oil/butter in the skillet.
- Increase the heat to medium-high. Add the chicken cubes to the skillet in a single layer, being careful not to overcrowd the pan. Sear the chicken on all sides until golden brown and cooked through, about 5-7 minutes total. If necessary, cook in batches to avoid overcrowding.
- Reduce the heat to low. Add the cooked garlic back to the skillet with the chicken. Stir to combine. Sprinkle the mozzarella cheese evenly over the chicken.
- Cover the skillet and cook until the cheese is melted and gooey, about 2-3 minutes.
- Warm the tortillas according to package directions (microwave or dry skillet).
- Place a generous portion of the cheesy garlic chicken mixture in the center of each tortilla. Add any desired optional add-ins.
- Fold in the sides of the tortilla and then roll it up tightly from the bottom.
- Serve immediately. For an extra crispy tortilla, you can lightly grill the wrapped wraps in the same skillet for a minute or two per side.


")